Tutorial Upgrade to Gingerbread for galaxy mini

hello everyone, and good evening. Now i want to share step by step how to upgrade your galaxy mini from froyo to gingerbread. for you that still use froyo can follow this tutorial below.
this Gingerbread is the final version, before going into the final v3.0 gingerbread, you should follow tutorial below. if you want get news, application, games, and more stay update with this tutorial for android blog.

ok, first download the required files:
Andro-ID v3.0 RC1
CSC_MULTI_S5570OLBKB1_CL931794

then follow this tutorial below:

  • Download first the two files above, when it
  • extract the Andro-id v3.0 rc1 file, then will appear 4 file and a program odin
  • then open the Odin
  • change your galaxy mini to download mode (press the volume down button + middle button + off), plug your mini with usb
  • then after your mini had already read all by odin the box collor will turn into yellow in odin

tutorial upgrade to gingerbread for galaxy mini


  • That must be filled in Odin:
    OPS = TASS_v1.0.ops
    BOOT =APBOOT_S5570XXKPF_CL189639_REV02_user_mid_true.tar .md5
    PHONE = MODEM_S5570XXKPF_CL189639_REV02.tar.md5
    PDA = CODE_S5570XXKPF_Andro-ID_V3.0_RC1.tar.md5
    CSC = CSC_MULTI_S5570OLBKB1_CL931794.tar.md5
  • then START
  • wait for about 5 minutes until everything is finished and there is appear pass written in the top box odin
  • finish


note:
• If you still wear mini firmware default, can be directly upgraded to the gingerbread, Ive tested it
• there are still many bugs in this version because it is not the final version, the final version will soon follow the tutorial
• if you fail to fit odin, remove the batteries, close the Odin, replace the battery, go again Download Mode, go to Odin, try again.

if you still confuse this is the video tutorial upgrade froyo to gingerbread for galaxy mini


Ok thats it, next post i will share the final version of gingerbread
see you ^_^

UPDATE!
I have make tutorial for better firmware and there are no bugs, you can see here upgrade galaxy mini to gingerbread 2.3.4
Read More..

Find or Locate Android Smartphone With Android Finder App

Android Finder application is a very good application for your smartphonr and you must install it on your device. Have you forgotten where you put the Android smartphone? No problem, have a whistle and he will respond by sensing the position. This is a totally free application and needs an owner who knows how to whistle otherwise it will not work! The App can be downloaded from Play store and installed directly on your smartphone.
find smartphone with Android Finder free


Android App To Locate Android Phone

Once installed it will be immediately ready for use. On my experience i installed the android finer app on my Samsung Galaxy S 3 and it works great! We have tried to hidden the phone in various parts of the house and with a simple whistle my smartphone has started to play to noting its position. So this app will help you to found and locate android smartphone if maybe you forgot when you place it or you lost you phone.

Which one of you is have known about "spring chicken" surely you remember such a thing out about twenty years ago. This was a key ring with the device discovery via whistle. This is the modern version of applied technology for smart phones with Android operating system.

Here we give the android finder free demo video which does not need any comment.


The App is fully configurable and can be activated by turning on the phone by doing the app will be ready to detect the position of your smartphone with a simple whistle.

DOWNLOAD

To download the Free Android App Finder go to the following web address: Android Finder free
Read More..

Tutorial Root HTC One S with Hasoon Toolkit

Thanks to hasoon toolkit, we can give you the news that the HTC One S smartphones, were already rooted. To root HTC One S devices now you can do it be only few simple steps, So you dont need to playing with ADB, or another terminal that can make you confuse if you are new in android customization

The rooting process had improved a lot in recent times, and turn away more and more days in which to have root permissions you had to manually modify the individual command lines. In particular, users who use HTC Ones you will find a toolkit capable of doing much more than just a rooting your phone. This tool can make a recovery, edit controls, gain permanent root permissions and much more.
In this guide we will explain how to install and use the all-in-one hasoon2000

root process on htc one s

But before start the guide i will give some review about its phone software
HTC One S is equipped with Sense 4.0 is definitely the best graphic customization that you can find on an Android smartphone, thanks to the large amount of useful software that are inside, such as applying for the weather, one for financial measures or notebook with handwriting. Excellent reactivity of Polaris Office for the management of office documents. It also has a good panel for managing the phone while using in your car.

Requirements
  • A phone HTC One S
  • A PC with Windows operating system
  • WinRar, 7-Zip, or a similar utility to unzip files
  • You have saved a backup of important data or have them transferred to the SD card
  • A high battery level, ideally over the 60-70%


Installing hasoon 2000 toolkit for HTC One S


How To Root HTC One S

Unlock the bootloader

The bootloader of the phone can be unlocked using the toolkit in a few simple steps.

  1. To install HTC drivers click on Install Htc Drivers , and then click Go. the drivers will be installed automatically on your PC.
  2. Click on Register at HTCDev , and then click Go to register for an account on Htcs website Development. Create an account and login.
  3. Click Get ID Token to select Go. A prompt will appear that will show you the ID of your phone. Now make sure that your phone is connected to your computer.
  4. Using the Submit ID Tokens and Go by entering your ID to the HTC site Development. Make sure you are logged in to the site before clicking on this box.
  5. If all procedures were completed without errors, you can now unlock the bootloader using Unlock Bootloader and click Go.

Here is the preview of hasoon toolkit for htc one s
hasoon root for htc one s

Start permanent root permissions

To obtain Root permissions on HTC device One S do the following:

  1. Connect your HTC One S to your computer using a USB cable
  2. Launch the toolkit all-in-one HTC
  3. From Commands, choose Boot into Recovery and click Do Command. Wait for your device to reboot in recovery mode
  4. Under Extras, choose Perm Root (GB/ICS) and click Run


You now already have root permissions on the phone! If you are dont like to complex procedures but you want to explore yourself the potential of your HTC One S, this toolkit will save you a lot of time and frustration, allowing you to run the main processes related to rooting and recovery directly from a single screen.
Read More..

Easy Tutorial Root Sony Xperia U On ICS Without Unlock Bootloader

For you that have Xperia U i have good news for you. Now you can root xpeia u without unlock bootloader so it means you will not void the warranty. That is such a interisting guide right? Ok but before we start the tutorial you must read all and make sure you did the step by step insrtuction correctly so you will success root you phone.
root xperia u on ics without unlock bootloader

This root tutorial is for Xperia U user that have upgraded to android Ice Cream Sandwich ROM. I know that there are many xperia u user that still confuse and try seacrh for the tutorial in the internet but hard to find the instruction that complete, easy, and without unlock bootloader to understand. So to solve those problem i make this tutorial based with my experience when i help my friend to root xperia u on ics. Also, after obtaining the ROOT, we will see how to customize the notifications bar to the Xperia U by adding useful toggle to change the system settings on the fly.

Point out, before we begin, that driving with the QuickPanel runs not only on Xperia U, but also on Xperia Sun, P and possibly S (I havent try to test unfortunately).Ok now lets start the tutorial


How To Root Sony Xperia U Ice Cream Sandwich Without Unlock Bootloader

below is the explanation. please read completely and so that you will success with the process, and once again i tell you if this tutorial dont need to unlock the bootloader so will not void your phone warranty.


  1. Download this zip file and unzip it.
  2. Run the program "runme.bat."
  3. Press 1 and sent
  4. With the phone turned on attach it to the computer via USB.
  5. The program will start a script, which will tell you to unlock your phone. Do so and youll find yourself in the APA backup and recovery. Select "RootMe" and click restore.
  6. Wait for it to finish and do not touch anything, the phone will restart. Once you have turned on the App SuperSU installed and Permissions Root.
  7. Make sure to select the file "RootMe" at APA backup and recovery, and careful that the phone is switched on.
  8. Finish. Now you have successfully Root Sony Xperia U, and you can fully customize your android smartphone.

After you have the successfully get the root acces, below i share guide to customize the notifications bar by adding useful toggle to change the system settings on the fly.
I advise you, however, to also follow the guide found below. It s really very interesting and useful.

Thanks to XDA we have two very easy ways to get the most comfortable Toggles in pull-down notifications. Thanks to the toggles in the notification bar you can change on the fly the main system settings without having to open each time the dedicated menu.

Requirements

your phone is on ICS firmware
have super user acces / root
A file manager (eg Root Explorer, ES File Manager) that allows you to manage the system folders

How to customize notification bar on Xperia U

  1. Download this file, put it in the memory of your phone and unzip it.
  2. It will come out two files: quickpanelsettings.apk and sistemUI.apk (or something like that). Move them both in the / system / app and set the permissions: rw-rr.
  3. Reboot.

After finished the installation you need to restart your phone, because if you not restart it first Sistem UI will crash continuously.

So now What do you think now of your "new" rooted Sony Xperia U Android Phone ?
Read More..

Android Facebook 2 0 App Update Released

Recently has been released facebook 2.0 app update for android Today i will share about a well known applications and used by all devices of various brands and with different operating systems, we are talking about the application of Facebook that allows you to use a client to be able to stay in touch with all our friends and paranti.

With the operating system of Apple or iOS , there are no major problems as regards the fluidity and the speed of navigation, but unfortunately for Android Operatinv system the facebook app have encountered several problems, one among many is the fluidity in the "shake" the new news feed or Simply open a photo.

Mark Zuckerberg had promised, in fact some time ago said that their employees were working on a new version of facebook app for Android that would bring huge benefits and also would have been solved speed problems.

Apparently today is the big day, in fact a few hours it is possible to download directly from Google Play Store the update to Facebook 2.0.

facebook 2.0 app update


Whats New

We summarize briefly the new android facebook app update allowing you to understand what is really changed:

Facbook 2.0 android App Feature


  • Overall speed improvement.
  • Opening photos more faster.
  • On our home page, there will be a banner that says "new news" when there will be.
  • New graphics for notifications will now be full screen.
  • New graphics for the shared post, where we will find a new provision regarding the various tags, like, share and comment.

Download Facebook 2.0 for android
If you want download the app directly as apk read on tutorial download apk frim google play.

And there is also led innovations that in short will be new to the new Facebook app on Android, of course we were happy even if certainly you can do better, in fact, an engineer who is part of the team of Zuckerberg, or Frank Du said this is the first important step to advance the Facebook app in the Android world.

What do you think about this new update?
Read More..

samsung galaxy ace 2 get update to ice cream sandwich

With all the fuss about Samsung Galaxy Ace 3, should not be forgotten that the Korean manufacturer also has some interesting devices under the class of the samsung galaxy Ace 3. For example, Galaxy Ace 2, the dual-core, current information indicates that the update will be the ice cream sandwich


Galaxy ace had great success internationally. it is Logic that Samsung is also designed for a replacement. We have Galaxy Ace 2 was presented in February. This is supported by ST-Ericsson CPU dual-core processors with "only" 800 MHz. This, however, absolutely clear to run Android 4.0. The people of SammyHub is promo video for a small device to get hold of this moment, strangely enough, in portrait format. It is announced that the Galaxy Ace 2 in each case, will get update to ice cream sandwich.

Next, have the Galaxy Ace Samsung PLS-2 is a screen with 3.8 inch TFT 840 x 400 resolution and weighs 122 grams and has dimensions of 6.2 x 11.8 x 1 cm. 768 MB of RAM is good for this performance class, 4 GB of internal memory is fine too, especially since you can expand it via MicroSD card. This camera has a resolution of 5 MP, the battery has a capacity of 1500 mAh end. So play the Ace 2 in terms of performance in the same league as Sonys Xperia U, which is available since the weekend.

SAMUNG GALAXY ACE 2 DEMO VIDEO


Galaxy Ace 2 can be purchased commercially in the next few weeks - also with the current street price of around € 270 but still quite expensive. Consider that there is to buy the Nexus Galaxy has been put to € 300. However, the Samsung Ace smartphone Galaxy 2 is that you have to remember, mainly because the price is definitely something.

Galaxy Ace 2 or Sony Xperia U - Smartphone the lower middle class will you choose you? People will be even more exciting HTC V, although the single core CPU? Opinion in the comments.
Read More..

Galaxy Nexus AOKP Android 4 1 Preview 3 release

For the Galaxy Nexus Google would actually give any update for the user via the OTA(What is OTA?). However, there are some users that use a rather different method by flash by themselves, the flash is also based on the Google ROM until it customized by the developers until it become new custom ROM. And for one of these, the AOKP Custom ROM, is now released the Preview with Android 4.1 Basic.

The AOKP custom ROM is no longer a secret for quite some time and is very popular with many Android smartphone users. All previously released version, however, are still printed on Android 4.0 base, and now after the release of Android 4.1 Jelly Bean, finally on a AOKP custom ROM with Android 4.1 Basic.

But even these are not recommended for everyday use. Not all features of Android 4.1 Preview 3 in the AOKP implemented in full for the Galaxy Nexus, the developers here at a little slower. Therefore, interested users that rely on stability rather wait a few weeks on the Android 4.1 Custom ROM AOKP for their Galaxy Nexus.


AOKP CUSTOM ROM ANDROID 4.1 PREVIEW 3


Who want to try this custom ROM or perhaps want to risk their galaxy nexus to try the updatecan find some instructions, but please notice its only for preview purpose because like what i have mentioned above if this version is still some bugs on it.
But you can try on this how to update galaxy nexus to android jelly bean. on that post is the best way. because on that post there are no bug, but that is not use the AOKP ROM, on that post use vicious V 3 ROM
However, those who have no experience with the flash of smartphones that should definitely keep your hands off! And also the other users in addition to the Galaxy Nexus Android devices still need to bring a little patience, only if the Galaxy Nexus version is ready, will be made ​​on the implementation of the other models.
Read More..

Nexus 4 Nexus 7 Nexus 10 Officially Announced

Google just announced on the official Google blog, the price and availability for the Nexus 4, Nexus 7 with 32 GB and 3G and the Nexus 10. Thus, all three devices are now officially released. In addition, we are excited about how low the prices for all high-end devices are.

Hurricane Sandy has forced Google to cancel the event in New York, but the Mountain View company has, however, announced the new products of the Nexus family. The numerous rumors in recent weeks are now confirmed with the launch of the nexus smartphone Nexus 4 and Nexus 10, accompanied by a  model with 32 GB of memory, the Nexus 7. For all these devices, Google has developed Android 4.2, the new release of the operating system that introduces a number of new features and improvements.

Google Nexus 4

nexus 4 release

The Nexus 4 is a smartphone with True HD IPS display Plus 4.7-inch (1280 × 768 pixels and 320 ppi) protected with Gorilla Glass 2, quad-core processor Qualcomm Snapdragon S4 Pro 1.5 GHz, 2 GB RAM, 8 or 16 GB of internal flash memory (no micro SD slot), dual cameras (8-megapixel rear and 1.3 megapixel front), WiFi 802.11 b / g / n, Bluetooth and NFC chip. The 2100 mAh battery provides up to 10 hours.

As was done by Nokia with the Lumia 920 and 820, Google decided to integrate a wireless charging system compatible with the Qi standard. This should allow you to use the same accessories designed for smartphones of the Finnish manufacturer. Google will offer its still a device called Wireless Charging Orb. It is an object of spherical shape "sliced" with an angle of approximately 45 degrees to allow the support of the Nexus 4. Both the charging dock that the smartphone is equipped with magnets that prevent slipping of the device. Daydream functionality included in Android 4.2 allows you to view photos, news from Google Currents and other information even when the Nexus 4 is charging.


Google has not signed any agreement with the U.S. phone operators and then the Nexus 4 will be "unlocked". No support for LTE networks, but 3G HSPA +. The sale of the 8 and 16 GB versions will begin on November 13th on Google Play store in the U.S., Canada, UK, Germany, France, Spain and Australia. Prices are respectively 299 and $ 349. The 16 GB version will also be available through T-Mobile for $ 199 with a two year contract.

Google Nexus 10

After the 7-inch model, Google announced a larger tablet based on Android 4.2 Jelly Bean. The Nexus 10 has a 10-inch screen Super PLS with an impressive resolution of 2560 × 1600 pixels (300 ppi). The hardware includes a dual core processor Samsung Exynos 5250 1.7 GHz (ARM Cortex A15) with Mali T604 GPU quad core, 2 GB RAM, 16 GB or 32 GB of internal memory, 5 megapixel rear camera and front 1.9-megapixel, micro USB, micro HDMI, two NFC chip, stereo speakers, Bluetooth 4.0 and WiFi 802.11b/g/n.

The 9000 mAh battery provides up to 9 hours of HD video playback and 500 hours of standby time. The thickness of the tablet is 8.9 mm, while the weight is 603 grams. The Nexus 10 will be on sale from November 13 on Google Play in the United States, United Kingdom, Australia, Canada, Germany, France, Spain and Japan. Prices are $ 399 for the 16GB model and $ 499 for the model 32 GB.

Google Nexus 7 32GB and 32GB + Mobile

nexus 7 tablet hands on

For the younger brother of the Nexus 7 Google has reserved a double novelty. The tablet will be available with 32 GB at $ 249, while the 16GB model will cost $ 199. Exits from the catalog 8 GB model (sold only in the U.S.). The 3G version also comes with support for HSPA + and Android 4.2 at a price of $ 299. The tablet will be "unlocked" and, like other products, can be purchased by November 13 on Google Play Store in the U.S., Canada, UK, Australia, France, Germany and Spain.


There is still an atmospheric video that shows all three devices as well as a few of the new features of Android 4.2 in action:


Read More..

Download Top 3 Best Photo Editing Apps for Android

Do you love anything that related with photograph arts, or maybe like editing photos?
and or maybe you often edit your image or photo collection with photoshop?
Now you can do your hobbies more easily. you doesnt have to use your big pc / laptop to edit it. Because now you can use your android smartphone to edit your image. there are many application that can help you. so now i will give the top best 3 Photo Edting Apps for android to you. so you can choose the best for your android gadget.
Now let me to I introduce you some of my favorite photo editing apps for your Android smartphones. I think They will be the best photo apps you will ever have.

Fx Camera

Fx Camera is also one of the best android editing photo application. This app will allows you to add for 40 different pictures effects with stable shot, white balance, zoom function and grid effect feature to your photos.

Fx Camera is also listed as one of Top ten hottest andoid apps. you can also see the rate of this application on google paly store from tyhe link. so just enjoy this apps. :)

download editing photo apps for android
To get this cool apps. DOWNLOAD FX Camera from google play (free)


Photoshop Express

Photoshop express is an is an android app developed by adobe. itll let you crop and rotate your pics, youll be able to regulate colour distinction of your respective pics.
this app can offer you a feel of using adobe photoshop pc on your android device. this app additionally let you share the edited photos on photos.com.

photoshop express for android

To get this cool apps. DOWNLOAD Photoshop Express from google play (free)

Piscart Photostudio

Piscart Photostudio is one of the many and most well-known picture modifying applications obtainable for android smartphones and devices. it comes with picsin network support that helps you simply download and read photos who may be obtainable on picsin network.

in the facilitate of piscart photostudio youll add number of effects on your pictures. this app lets you produce drawing across the use of bit screen and youll conjointly produce collage of totally different photos.
download best photo apps for android
To get this cool apps. DOWNLOAD Piscart Photostudio from google play (free)
Read More..

How To Flash Cyanogenmod 10 on LG Optimus Black

Good news for all those who are the owners of the smartphone LG Optimus Black, Because has been released the new ROM stable CyanogenMod 10 for this device which is customized with the new operating system Android 4.1 Jelly Bean. Today we will see the guide to install this new ROM, we will give the instruction as clearly we can so you can understand it easily. So lets see the tutorial installation below.

flash cyanogenmod10 on lg optimus black 10


requirements that you have to install with this new ROM:
  • you already have root acces on your lg optimus p970
  • have installed ClockworkMod Recovery
  • Nandroid Backup (recommended)


Tutorial Flash LG Optimus Black P970

Follow the step below for instruction to flash cyanogenmod 10 on lp optimus p970
  1. first download the ROM list in this page ;
  2. download the Google Apps from here ;
  3. copy both files to the SD;
  4. Put the device in recovery mode (with Clockworkmod);
  5. perform wipe data / factory reset, wipe cache partitions;
  6. hour position yourself in the "advanced" tab and wipe Dalvik cache;
  7. now select "install zip from sd card" then "choose zip from sd card";
  8. select the file and confirm the CM 10;
  9. Now the last step, select "install zip from sd card" then "choose zip from sd card" and choose the file of Google Apps and confirmed, now wait for the the process finished and restart the device.
Read also anoither tutorial: install cyanogenmod 7 On Lg optimus Speed

For those who coming from a previous version of CynogenMod 10 official must follow the following guidelines:
  • first download the ROM above.
  • copy the file to the SD card;
  • go to recovery (with CWM);
  • select "install zip from sd card" then "choose zip from sd card";
  • select the file of the CM 10 and confirm, wait for the operation to finish and restart
OK thats for the tutorial flash cm 10 on lg optimus P970, i hope this can help you that want to use the cyanogenmod which is the most popular custom rom.
Read More..

How To Install S Voice For Samsung Galaxy S2

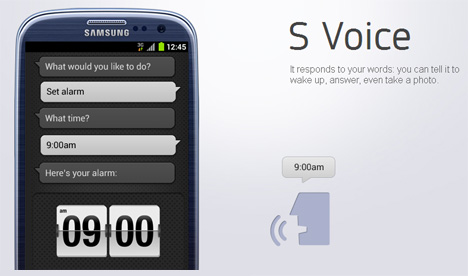
We know that S voice is new technology developed by samsung to compete with apple siri. On this post you can read about tutorial install S Voice On Samsung Galaxy S2. We talked several times of the Samsung Galaxy S 3 and S-Voice such as on this article S Voice For Samsung Galaxy S3 alternatives for siri , the new voice dictation / command service that Samsung has installed on this new Android smartphone.

With the S Voice service draws on Samsung now: Who wants his Android phone to give instructions, must develop the upcoming flagship phone Galaxy S3 and Galaxy S2, as for other devices, the service is not yet planned. So it at least allow the developer to work for the best.


how to install s voice on galaxy s2


Today, we will see How to install S Voice for Samsung Galaxy S 2, the previous model of Samsung, on which the installation of S Voice brought some trouble for some users. Lets see how to install S Voice .

Requirements

Tutorial Install S Voice On Samsung Galaxy S2

  1. Download this archive from this link http://adf.ly/HZpEk, unpack it and copy the two files in any folder (create it from scratch) within the Galaxy S 2.
  2. Open Root Explorer
  3. Go to the /mnt/sdcard folder (if you copied the files in the internal memory) or /mnt/emmc (if you have them copied to the external memory)
  4. Go to the folder where you copied the files previously
  5. At the top you will find a statement saying Install R/W, press it. This step allows you to write system folders
  6. Press and hold on the file voicetalk.apk to the contextual menu, then select "copy"
  7. Go now in the /system/app folder and paste the file you just copied
  8. Now, always in /system/app, hold on voicetalk.apk and in the menu select "permissions", to read as follows:
    s voice for galaxy s2
  9. Go to the folder where you originally inserted the file and copy libsvoctts.so
  10. Paste it in/system/lib
  11. Close Root Explorer and restart your Galaxy S 2.


Well, we had finished the installation process, it so simple, fast and easy to do. Now you can enjoy your voice assistant on your device. dont forget keep follow us Android Aplication review
If your device still not supported you can go to my post about : siri alternatives application for android
Read More..

Samsung Galaxy S3 Android 4 1 2 Firmware Leaked I9300XXELK4

Its happened once again: The guys from SamMobile have released a flashable android jelly bean firmware with ODIN that the Samsung Galaxy S III Android 4.1.2 missed. This is the second test firmware which is therefore not final, This version is called I9300XXELK4. So this firmware maybe still not fully optimized.
Galaxy S3 jellybean I9300XXELK4

Of course, this version is still far from a perfect and final, This I9300XXELK4 version is the second Samsung Galaxy S3 Android 4.1.2 test firmware. Therefore, everything is still a little buggy.

Therefore, it can of course also still problems, so the more cautious among you should prefer to wait a bit and wait for the official update. For those more adventurous, there are a few new features, some of which are also on the Galaxy Note 2.

Android 4.1.2 New Feature on Galaxy S3

New feature that implemented on android 4.1.2 for Galaxy S3 such as:

  • Multi-Window (As in Note 2)
  • Page Buddy (Smarter home screen)
  • New Notification Panel
  • Smart rotation (screen does not rotate when lying down)
  • New Samsung Keyboard
  • Paper Artist App
  • New Gallery app (As in Note 2)
  • internet connection more stable
  • and much more

The firmware is up and running, according SamMobile very stable. How to flash a brief look here. Compiles the firmware was at 8:11:12, it is therefore a version
Read More..

Droid Explorer Best Apps To Manage Android File on Windows PC

Do you need a file manager application for your android smartphone? Or maybe you still confuse which is the best fil manager application? On this post i will share my experience with droid explorer which is in my opinion it is the best app to manage android file on windows pc or laprop.

I recommend you to try the Droid Explorer app, an excellent free application that allows you to better manage file on Android smartphone from your Windows PC. The program is free and allows you to manage every aspect of your Android smartphone or tablet.

preview of droid explorer

android apps to manage file on pc


Manage Android File From PC

Droid Explorer allows you to perform various operations with your Android smartphone from  PC.

the feature from this app such as mentioned below:
  • Explore the Android smartphone and see all the files stored on it.
  • Transfer any file to your smartphone or tablet from PC Windows and vice versa, with a simple drag & drop.
  • Quickly install and uninstall programs on Android from a Windows PC (even APK file).
  • Capture screenshots on Android directly from a Windows PC.
  • Record video interface on your Android smartphone or tablet, using your Windows PC.
  • Quickly install the update file (the update.zip).
  • Do a full backup of Android or do a full restore from a previous backup.

DOWNLOAD

To Download droid explorer go here

As you can see, the program is very comprehensive and allows you to do almost anything with your Android smartphone, all from your Windows PC. And remember that those listed are not even all the functions of the program, because it offers much, much more!

All very simple and fast. you can perform any kind of operation, manage file from PC on your Android device, directly from Windows. Try it and let me know what you think and how you are with Droid Explorer.


Read More..

How to Update Galaxy s3 Firmware to XXBLG8 Android 4 0 4

Yesterday i have post about the release of galaxy s 3 firmware XXBLG8 update. although Just one day ago Samsung released the XXBLG6 Android 4.0.4 firmware update for the Galaxy S3 in the UK, but now samsung release again this firmware update because on the XXBLG6 firmware the search feature is removed. They say if that is an accident, so they replaced it again.
galaxy s 3 firmware XXBLG8 update

If your galaxy s3 firmware is XXBLG6 or maybe the another version just simply check in Settings » About, on there you can check your firmware version. you can flash your galaxy s3 to the XXBLG8 firmware by following the tutorial below. XXBLG8 is the latest firmware that released by samsung. so you can update to it, it doesnt matter in which country you are now. And now the galaxy s3 users can enjoy again the search feature. on this post you can update your galaxy s3 fimrware to XXBLG8

Compatibility

This tutorial below are compatible only with the international Galaxy S3, model number i9300. It’s not compatible with the US variants or other devices. ypu can check in: Settings » About phone.

Read First

Do With Your Own Risk


How to Update Galaxy S3 to XXBLG8 Android 4.0.4 Firmware

  1. Back up your important data on your phone. you dont need to back up your SD card data because on that place is always safe. so just bcak up apps and data on your phone.
  2. Download and install Kies software on your computer, this install the necessary drivers for your phone.
    You also can download the drivers directly from here: 32 bit Windows or 64-bit Windows
  3. Download the firmware.
    Download XXBLG8. it contains file: I9300XXBLG8_I9300OXABLG8_BTU.zip.
  4. Then extract the zip file file that you have downloaded above on the computer. aftrer extracted you will find a file named I9300XXBLG8_I9300OXABLG8_I9300XXLG8_HOME.tar.md5.
  5. Download the Odin. Odin is a tools that used to flash stuff – firmware, kernels, etc. – on Samsung phones. We’ll use Odin to flash the firmware file obtained in step 4. to download odin you can go this post. download latest odin.
  6. Extract the contents of the Odin file above to a folder on your computer.
  7. Now, turn off your Galaxy S3.
  8. Then, change your galaxy s3 into download mode. To do that, press and hold Volume Down + Home + Power together till the screen turns on. Then press Volume Up to enter download mode.
  9. Open Odin the Odin3 v3.04.exe. the file that you get from step 6.
  10. Please Notice! Connect your phone to PC now, you can use your USB data cable. You should get the message “Added” on the Odin’s message box in the bottom left.
    If you don’t found this message, make sure you installed drivers correctly (using Kies or directly download) as i given in step 1. If it still doesn’t work, try changing to another USB port.
  11. Then Click on the PDA button in Odin, then browse select the I9300XXBLG8_I9300OXABLG8_I9300XXLG8_HOME.tar.md5 file that you can get in step 4 above.
  12. Please Notice! Do not make any other changes in Odin except selecting the required files as given in step 11. and one again please dont check the box on Re-Partition check box.
  13. Now, click the Start button to start flashing the firmware on your phone.
  14. When the flashing process completed, you’ll get a PASS message (with green background). the position is in the left-most box at the top of the Odin, and the phone will automatically reboot.
    And When you see the Samsung logo appear, you can safely unplug the cable.
  15. Please Notice!. if ODIN gets stuck on setup connection or at any stage of the flash process after click the Start button, and its seem to be doing the process, or if after the process of the flash completed you get a FAIL message (with red background).
    do this instruction:
    disconnect your galaxy s3 from PC, close ODIN, remove battery for 4-5 seconds, then re-insert it again, then make you galaxy s3 to enter Download mode again, and do the procedure again from Step 9.
  16. After you get the PASS message and then your galaxy s3 reboots, the phone maybe will get stuck at the booting animation. If that really happens, do the following tutorial to make it boot. please Remember that these steps will wipe your all personal data. If your phone has already booted, skip these steps, because your galaxy s3 firmware has been updated successfully:
    - Boot to recovery mode. to do so, first power off your device (by removing battery and reinserting it), wait approximately for 5-6 seconds, and then press and hold Home + Volume Up + Power keys together till your phone turns on, then let them go to boot into recovery. after you have enter in recovery mode, use volume keys to move the selection up and down and home/power key to select the option.
    - Then go to Wipe data/Factory Reset, then select it. Select Yes on next screen.
    - Then, go to Wipe Cache and select it. on the next screen Confirm Yes.
    - Then, select reboot system now to reboot your device, and now your phone will boot properly.

Finish, now Your Galaxy S3 is running with the XXBLG6 Android 4.0.4 firmware. just comment if you want to ask anything.
Read More..
Powered by Blogger.